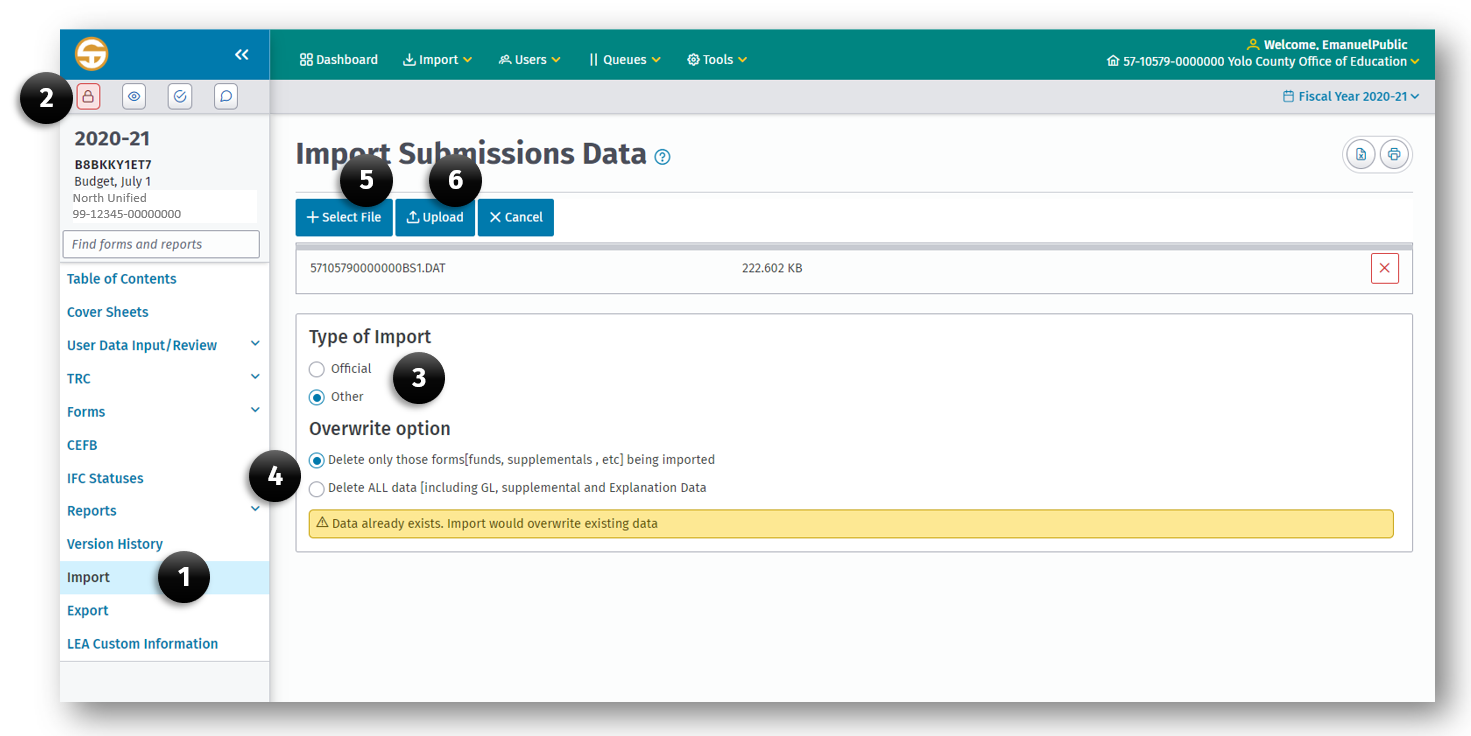
Overwrite Datasets

The Overwrite Dataset feature allows a user to replace all or part of existing data within a specific dataset.
When a user is working within a dataset and chooses Import all or part of the data from another file, the Delete All Data option deletes all data associated with the [CDS Number] for the selected dataset including GL, Supplemental and Explanation data, Fiscal Year, Reporting Period, and Type of Data.
When a user imports data using the Delete Only option, selected forms (funds, supplementals, etc.) are imported.
Note: Options are based on selecting the Type of Import: Other or Official. Selecting Official allows only the Delete All data overwrite option. Selecting Other will provide the user with the option to overwrite only the forms being imported or Delete All data.

To overwrite part or all data in a dataset
- Click the Import menu item on the left navigation bar in the current submission.
- Lock the submission by clicking the Lock Submission button.
- Select Official or Other to identify the Type of Import to be used.
-
Select the Type of Import/Overwrite by selecting either:
a. Delete only those forms (funds, supplementals, etc.) being imported.
b. Delete ALL data (including GL, supplemental and Explanation Data).
-
Click the + Select File button to select the dataset to be used.
- Click the Upload button to complete the import process.
Stop Import
A user may stop the import process at any time by clicking the Cancel button.
Note: The data import will not be committed until entire process completes.
Print or Export Import Results
To print the import results:
A. To print to PDF, click the Print button.
B. To export to Excel, click the Export button.